
This guide walks you through diagnosing and fixing low power issues related to the flywheel on a Honda GCV160 engine. You’ll learn how to inspect, clean, and test the flywheel and ignition system safely and effectively.
Key Takeaways
- Inspect the flywheel key: A sheared or damaged flywheel key can cause timing issues, leading to low engine power or failure to start.
- Check for debris and buildup: Dirt, oil, or grass clippings around the flywheel can restrict airflow and cooling, reducing performance.
- Test the ignition coil gap: An incorrect air gap between the flywheel magnets and ignition coil can weaken spark, affecting power output.
- Ensure proper flywheel clearance: Excessive wobble or misalignment can damage the coil and reduce engine efficiency.
- Clean the cooling fins: Clogged cooling fins prevent proper heat dissipation, causing the engine to overheat and lose power.
- Verify magnet strength: Weak or damaged flywheel magnets reduce spark energy, directly impacting engine performance.
- Follow safety protocols: Always disconnect the spark plug and allow the engine to cool before working on the flywheel area.
Quick Answers to Common Questions
Tip/Question?
Can I reuse a slightly damaged flywheel key?
No. Even a slightly damaged key can shear under stress, causing timing issues and potential engine damage. Always replace it with a new one.
Tip/Question?
How often should I clean the flywheel cooling fins?
Clean them at least once per season or after heavy use. More often if you operate in dusty or grassy conditions.
Tip/Question?
What’s the correct ignition coil gap for the GCV160?
The recommended gap is 0.008–0.012 inches (0.2–0.3 mm). Use a feeler gauge to measure and adjust as needed.
Tip/Question?
Can I remove the flywheel without a puller?
It’s not recommended. Using a puller ensures even force and prevents damage. Improvised methods can bend the crankshaft or flywheel.
Tip/Question?
Why does my engine lose power when hot?
This could be due to overheating from clogged cooling fins or a weak ignition system. Inspect the flywheel and coil when the engine is cool.
Introduction: Why Your GCV160 Engine Might Be Losing Power
If your Honda GCV160 engine—commonly found in lawn mowers, pressure washers, and small generators—is running weak, sputtering, or failing to start, the flywheel could be the culprit. The flywheel plays a critical role in engine timing, cooling, and ignition. When it’s damaged, dirty, or misaligned, your engine won’t deliver full power, no matter how much fuel you give it.
In this comprehensive troubleshooting guide, we’ll walk you through every step of diagnosing and fixing low power issues related to the flywheel on the GCV160. You’ll learn how to safely remove the flywheel, inspect key components, test for electrical issues, and reassemble everything correctly. Whether you’re a DIY enthusiast or a small engine technician, this guide will help you restore your engine’s performance quickly and safely.
Understanding the Flywheel’s Role in the GCV160 Engine
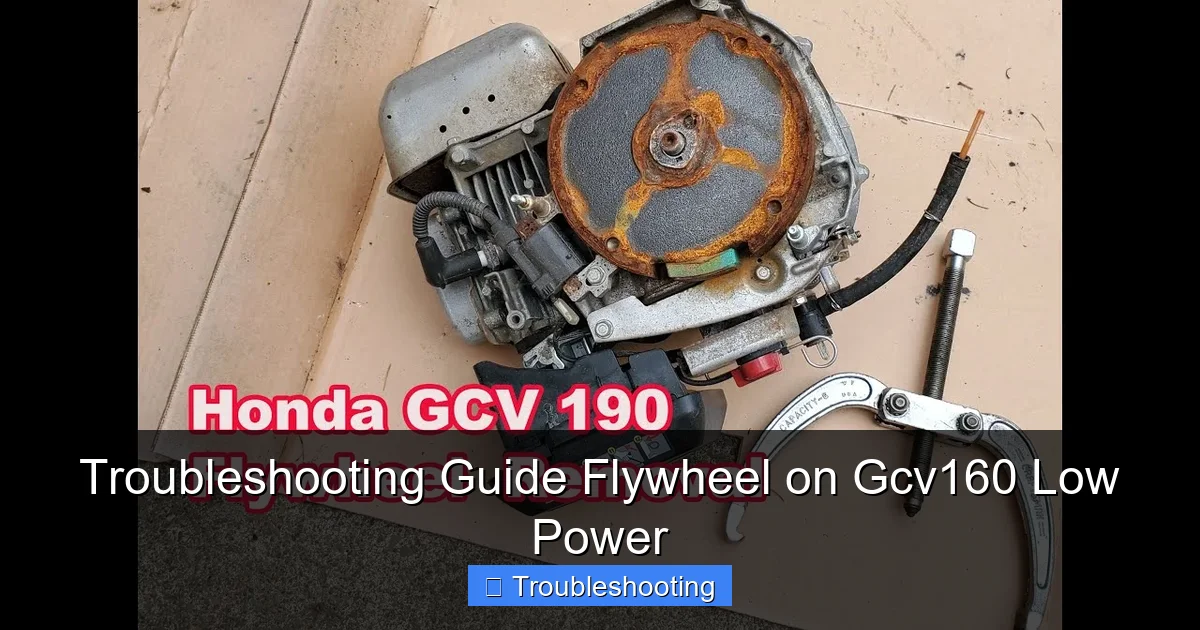
The flywheel on the Honda GCV160 is more than just a spinning metal disc. It serves multiple vital functions:
Visual guide about Troubleshooting Guide Flywheel on Gcv160 Low Power
Image source: i.ytimg.com
- Engine Timing: The flywheel key ensures the crankshaft and flywheel rotate in sync. If this key is damaged, the engine’s timing is off, leading to poor combustion and low power.
- Ignition System: Permanent magnets embedded in the flywheel pass by the ignition coil, generating the spark needed to ignite the fuel-air mixture. If the magnets are weak or the coil is misaligned, spark strength drops.
- Cooling: The flywheel has cooling fins that draw air through the engine to prevent overheating. Clogged fins reduce airflow, causing the engine to overheat and lose power.
- Energy Storage: The flywheel’s mass helps maintain consistent engine speed during the power stroke, smoothing out operation.
When any of these functions are compromised, your engine will struggle. Low power, hard starting, or stalling are common symptoms. The good news? Most flywheel-related issues are fixable with basic tools and careful inspection.
Tools and Safety Precautions
Before you begin, gather the right tools and follow safety guidelines to avoid injury or further damage.
Visual guide about Troubleshooting Guide Flywheel on Gcv160 Low Power
Image source: i.ytimg.com
Required Tools
- Socket wrench set (typically 10mm, 12mm, and 14mm)
- Flywheel puller (specific to GCV160 or universal type)
- Torque wrench
- Feeler gauge (for coil gap measurement)
- Clean rags and degreaser
- Compressed air (optional, for cleaning)
- Multimeter (for testing coil resistance)
- Safety glasses and gloves
Safety First
- Disconnect the spark plug: Always remove the spark plug wire and ground it to prevent accidental starting.
- Let the engine cool: Never work on a hot engine. Allow at least 30 minutes after use.
- Work in a clean, well-lit area: This helps you spot small parts and avoid losing components.
- Use proper lifting techniques: The flywheel is heavy and can cause injury if dropped.
Taking these precautions ensures a safe and effective repair process.
Step 1: Diagnosing Low Power – Is It the Flywheel?
Before tearing into the engine, confirm that the flywheel is actually the problem. Low power can stem from fuel, air, or ignition issues. Use this checklist to narrow it down:
Check the Basics First
- Fuel system: Is the fuel fresh? Is the carburetor clean? Clogged jets or stale fuel can mimic flywheel issues.
- Air filter: A dirty air filter restricts airflow, reducing power. Replace or clean it if needed.
- Spark plug: Remove and inspect the spark plug. A fouled or worn plug can cause weak ignition.
- Exhaust system: A blocked muffler or spark arrestor can restrict exhaust flow, lowering performance.
Signs the Flywheel Is the Problem
- Engine starts but runs weakly or stalls under load
- Intermittent spark or no spark at all
- Engine backfires or runs erratically
- Visible damage around the flywheel area (e.g., sheared key, bent fins)
- Overheating despite clean air filter and proper oil level
If you’ve ruled out fuel, air, and basic ignition issues, it’s time to inspect the flywheel.
Step 2: Removing the Flywheel
Removing the flywheel requires care to avoid damaging the crankshaft or other components. Follow these steps:
Step 2.1: Access the Flywheel
- Remove the engine shroud or cover. On most GCV160 engines, this involves unscrewing 4–6 bolts around the perimeter.
- Locate the flywheel—it’s the large, finned metal disc attached to the top of the crankshaft.
- Note the position of any wires or brackets near the flywheel for reassembly.
Step 2.2: Secure the Crankshaft
- To prevent the crankshaft from turning while loosening the flywheel nut, use a flywheel holder tool or wedge a screwdriver in the starter clutch (if equipped).
- Alternatively, you can use a strap wrench or locking pliers on the flywheel fins—but be gentle to avoid bending them.
Step 2.3: Remove the Flywheel Nut
- The flywheel nut is typically a 14mm or 17mm bolt, tightened to around 40–50 ft-lbs.
- Use a socket wrench and breaker bar to loosen it counterclockwise.
- Once loose, unscrew it by hand and set it aside in a safe place.
Step 2.4: Use a Flywheel Puller
- Attach the flywheel puller to the flywheel using the provided bolts. Tighten the center bolt slowly and evenly.
- As you tighten, the flywheel will gradually lift off the crankshaft taper. Do not force it—if it’s stuck, apply penetrating oil and wait.
- Once removed, carefully lift the flywheel off and place it on a clean, flat surface.
⚠️ Warning: Never strike the flywheel with a hammer. This can damage the crankshaft taper or bend the fins.
Step 3: Inspecting the Flywheel and Related Components
With the flywheel removed, inspect each component for damage or wear.
Step 3.1: Check the Flywheel Key
- Locate the flywheel key—a small, rectangular metal piece seated in a slot on the crankshaft.
- Inspect it for cracks, wear, or shearing. A damaged key will cause the flywheel to slip, throwing off ignition timing.
- If the key is damaged, replace it with an OEM or high-quality aftermarket part. Do not reuse a damaged key.
Step 3.2: Examine the Flywheel Magnets
- Look at the inner surface of the flywheel where the magnets are embedded.
- Check for cracks, chips, or loose magnets. Damaged magnets won’t generate a strong magnetic field, weakening the spark.
- Use a multimeter to test magnet strength if possible (advanced users only). Weak magnets may need flywheel replacement.
Step 3.3: Inspect the Cooling Fins
- Look for dirt, grass, oil, or debris clogging the cooling fins.
- Use compressed air or a soft brush to clean them thoroughly. Clogged fins reduce airflow, causing overheating and power loss.
- Check for bent or broken fins. Minor bends can be carefully straightened; severely damaged fins may require flywheel replacement.
Step 3.4: Check the Crankshaft Taper
- Inspect the crankshaft taper (the tapered end where the flywheel mounts) for wear, scoring, or corrosion.
- A damaged taper can prevent proper flywheel seating, leading to wobble and vibration.
- Light scratches can be cleaned with fine sandpaper; deep damage may require crankshaft repair or replacement.
Step 3.5: Inspect the Ignition Coil
- Locate the ignition coil mounted near the flywheel.
- Check for cracks, burns, or loose mounting bolts.
- Measure the air gap between the coil and flywheel magnets using a feeler gauge. The correct gap for the GCV160 is typically 0.008–0.012 inches (0.2–0.3 mm).
- If the gap is too wide or too narrow, adjust the coil position by loosening the mounting bolts and repositioning it.
Step 4: Cleaning and Maintenance
Even if no damage is found, cleaning the flywheel and surrounding area can restore performance.
Step 4.1: Clean the Flywheel
- Wipe the flywheel with a clean rag and degreaser to remove oil, dirt, and carbon buildup.
- Pay special attention to the magnet areas and cooling fins.
- Allow it to dry completely before reinstallation.
Step 4.2: Clean the Engine Housing
- Use compressed air or a brush to remove debris from the engine housing, especially around the cooling intake.
- Check the blower housing for blockages that could restrict airflow.
Step 4.3: Lubricate Moving Parts (If Applicable)
- While the flywheel is off, inspect the governor gear and linkage (if accessible).
- Apply a small amount of light oil to pivot points to ensure smooth operation.
Step 5: Reinstalling the Flywheel
Proper reinstallation is critical for engine performance and safety.
Step 5.1: Align the Flywheel Key
- Place the new or inspected flywheel key into the slot on the crankshaft.
- Ensure it sits flush and is not tilted or loose.
Step 5.2: Mount the Flywheel
- Carefully slide the flywheel onto the crankshaft taper, aligning the key with the slot in the flywheel.
- Press it on by hand until it seats fully. Do not hammer it.
Step 5.3: Tighten the Flywheel Nut
- Thread the flywheel nut onto the crankshaft by hand to avoid cross-threading.
- Tighten it to the manufacturer’s specification—typically 40–50 ft-lbs—using a torque wrench.
- Recheck the ignition coil gap after tightening, as the flywheel may shift slightly.
Step 5.4: Reassemble the Engine
- Reattach the engine shroud or cover, securing all bolts evenly.
- Reconnect the spark plug wire.
Step 6: Testing the Engine
After reassembly, test the engine to confirm the fix.
Step 6.1: Start the Engine
- Pull the starter cord or turn the ignition key.
- Listen for smooth operation. The engine should start easily and run steadily.
Step 6.2: Check for Power and Stability
- Apply a light load (e.g., engage the mower blade or run a pressure washer).
- The engine should maintain RPM without sputtering or stalling.
Step 6.3: Monitor Temperature
- Run the engine for 5–10 minutes and check for overheating.
- Touch the engine housing—it should be warm but not too hot to touch.
If the engine runs well, the flywheel issue is resolved. If problems persist, recheck your work or consult a professional.
Troubleshooting Common Flywheel Issues
Even after following this guide, you might encounter lingering issues. Here’s how to address them:
Engine Still Lacks Power
- Double-check the ignition coil gap and magnet alignment.
- Test the spark plug for strong spark (hold it against the engine block while cranking).
- Verify fuel delivery and carburetor function.
Engine Vibrates Excessively
- Ensure the flywheel is seated properly and the nut is torqued correctly.
- Check for bent fins or imbalance in the flywheel.
No Spark After Reassembly
- Confirm the flywheel key is intact and properly aligned.
- Check for damaged ignition coil or broken wires.
- Ensure the coil is not touching the flywheel (causing a short).
Engine Overheats
- Recheck cooling fin cleanliness and airflow.
- Verify the blower housing is properly sealed.
Conclusion: Restoring Power to Your GCV160
Troubleshooting low power issues on the Honda GCV160 flywheel may seem daunting, but with the right approach, it’s a manageable task. By systematically inspecting the flywheel key, magnets, cooling fins, and ignition coil, you can identify and fix the root cause of performance problems. Regular maintenance—like cleaning the flywheel area and checking the ignition gap—can prevent future issues and extend engine life.
Remember, safety is paramount. Always disconnect the spark plug and allow the engine to cool before starting. Use the correct tools, especially a flywheel puller, to avoid damage. And when in doubt, consult your engine’s service manual or a qualified technician.
With this guide, you’re equipped to keep your GCV160 running strong, whether it’s powering your lawn mower, generator, or pressure washer. A little attention to the flywheel can make a big difference in performance and reliability.