
This guide helps you diagnose and fix backfiring caused by faulty piston rings in the GCV160 engine. You’ll learn inspection steps, common causes, and repair techniques to restore smooth engine performance.
Key Takeaways
- Backfiring often signals piston ring wear or damage in small engines like the GCV160, especially under load or during deceleration.
- Inspect compression and perform a leak-down test to confirm if piston rings are the root cause of the issue.
- Carbon buildup on rings can cause sticking, leading to poor sealing and backfiring—cleaning may resolve the problem without full replacement.
- Always replace piston rings as a matched set and ensure proper orientation during installation to avoid future issues.
- Use manufacturer-specified tools and torque settings when reassembling the engine to prevent damage and ensure reliability.
- Regular maintenance, including air filter and spark plug checks, helps prevent premature ring wear and engine misfires.
- After repair, test the engine under various loads to confirm the backfiring is resolved and performance is restored.
Quick Answers to Common Questions
Tip/Question?
Can I clean stuck piston rings instead of replacing them?
Yes, if the rings are not broken, you can try cleaning them with a ring groove tool and solvent. Soak the piston in parts cleaner, then gently scrape out carbon. Reinstall and test—sometimes this restores function.
Tip/Question?
How often should I replace piston rings on a GCV160?
There’s no set interval. Replace them only when compression is low, oil consumption is high, or during a major engine rebuild—typically after 500–1000 hours of use, depending on maintenance.
Tip/Question?
What’s the best way to store my GCV160 to protect piston rings?
Drain the fuel or add stabilizer, run the engine to circulate treated fuel, change the oil, and store in a dry place. This prevents corrosion and ring sticking.
Tip/Question?
Can a bad muffler cause backfiring even with good rings?
Yes, a clogged or damaged muffler can trap exhaust gases and cause backfiring. Always inspect the exhaust system when diagnosing backfire issues.
Tip/Question?
Should I replace the piston when changing rings?
Not always. If the piston shows no cracks, scoring, or excessive wear, you can reuse it. However, if the cylinder is worn, consider a rebore and oversize piston kit.
Introduction: Understanding Backfiring and the Role of Piston Rings
If your Honda GCV160 engine is backfiring—especially during deceleration or under load—it’s not just annoying; it’s a sign something’s wrong. Backfiring happens when unburned fuel ignites in the exhaust system or combustion chamber at the wrong time. While several factors can cause this, one of the most overlooked yet critical culprits is a failing piston ring set.
The GCV160, commonly used in lawn mowers, pressure washers, and small generators, relies on a simple but precise four-stroke engine design. The piston rings play a vital role in sealing the combustion chamber, controlling oil consumption, and maintaining proper compression. When these rings wear out, get stuck, or break, the engine loses compression, misfires occur, and backfiring becomes likely.
In this comprehensive troubleshooting guide, you’ll learn how to identify whether your piston ring set is causing backfiring, how to inspect and test the components, and how to repair or replace them correctly. Whether you’re a DIY enthusiast or a small engine technician, this step-by-step walkthrough will help you restore your GCV160 to peak performance.
What Causes Backfiring in the GCV160?
Visual guide about Troubleshooting Guide Piston Ring Set on Gcv160 Backfiring
Image source: image.chukouplus.com
Before diving into piston ring troubleshooting, it’s important to understand why backfiring happens. Backfiring can occur in two main ways: through the exhaust (afterfire) or through the intake (prefire). In the GCV160, exhaust backfiring is more common and often linked to incomplete combustion.
Common Causes of Backfiring
- Lean or rich fuel mixture: Too much air (lean) or too much fuel (rich) can cause unburned fuel to enter the exhaust system.
- Ignition timing issues: A faulty ignition coil or spark plug can cause late or erratic spark, leading to misfires.
- Valve problems: Sticking or improperly adjusted valves can disrupt the air-fuel flow.
- Piston ring failure: Worn, broken, or stuck rings reduce compression, allowing blow-by and incomplete combustion.
- Exhaust restrictions: A clogged muffler or carbon buildup can trap hot gases and ignite fuel prematurely.
While many of these issues can mimic piston ring problems, a compression test and visual inspection will help narrow down the root cause.
Why Piston Rings Matter in the GCV160
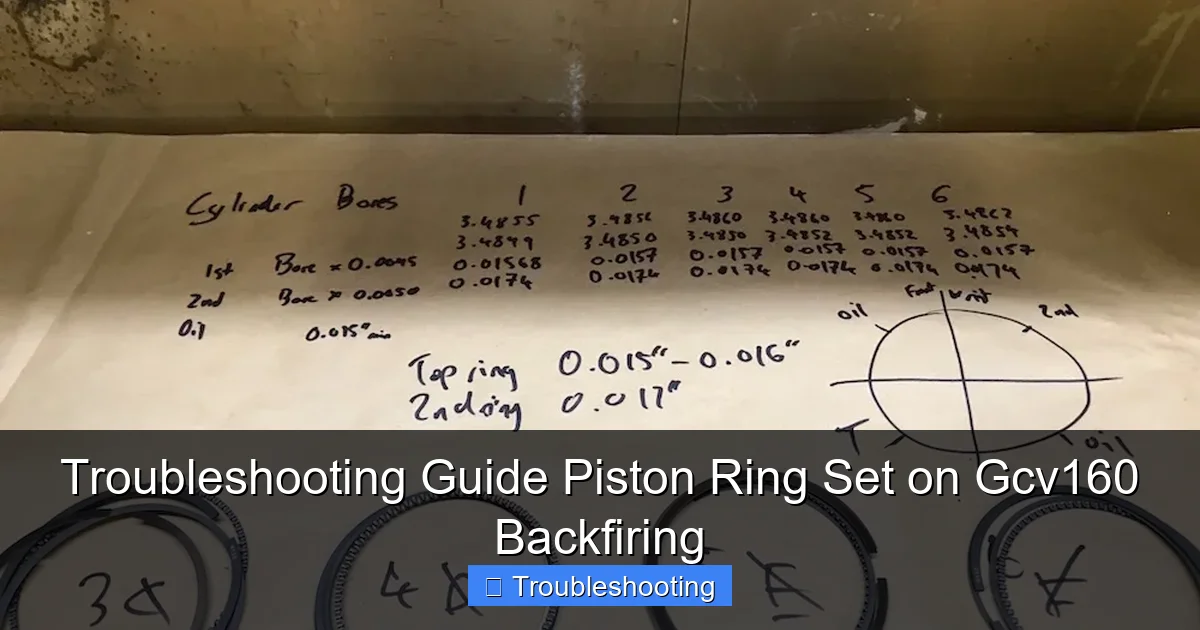
Visual guide about Troubleshooting Guide Piston Ring Set on Gcv160 Backfiring
Image source: images.squarespace-cdn.com
The GCV160 uses a two-ring piston setup: one compression ring and one oil control ring. These rings must maintain a tight seal between the piston and cylinder wall. Their jobs include:
- Sealing the combustion chamber: Prevents pressure loss during compression and power strokes.
- Regulating oil consumption: The oil ring scrapes excess oil from the cylinder walls to prevent burning.
- Heat transfer: Helps transfer heat from the piston to the cylinder wall for cooling.
When rings wear or fail, combustion gases escape past the piston (called blow-by), reducing engine power and increasing oil consumption. This blow-by can carry unburned fuel into the crankcase and exhaust, leading to backfiring.
Step 1: Initial Diagnosis – Is It Really the Piston Rings?
Before tearing apart your engine, confirm that piston rings are the likely cause. Start with simple checks to rule out other common issues.
Check the Spark Plug
Remove the spark plug and inspect it. A fouled, wet, or damaged plug can cause misfires and backfiring.
- Wet with fuel: Indicates a rich mixture or flooding—check the carburetor.
- Black and sooty: Suggests oil burning, possibly from worn rings.
- White or blistered: Points to overheating or lean mixture.
Replace the spark plug if it’s damaged or excessively fouled. Use a GCV160-compatible plug (typically NGK BPR6ES or equivalent).
Inspect the Air Filter
A dirty or clogged air filter restricts airflow, creating a rich mixture that can cause backfiring.
- Remove the air filter cover and inspect the filter.
- If it’s dirty, clean it (if reusable) or replace it.
- Ensure the air filter housing is sealed properly to prevent unfiltered air from entering.
Test the Fuel System
Stale fuel, clogged fuel lines, or a dirty carburetor can disrupt the air-fuel ratio.
- Drain old fuel and replace it with fresh, ethanol-free gasoline.
- Check the fuel filter and fuel lines for blockages.
- Clean the carburetor if necessary, paying attention to the idle and main jets.
Listen for Unusual Noises
Start the engine and listen carefully. A rattling or knocking sound from the cylinder area may indicate piston or ring damage. Backfiring during deceleration is a strong clue that compression is leaking past the rings.
Step 2: Perform a Compression Test
A compression test is the most reliable way to assess piston ring condition. Low compression often points to ring wear or cylinder damage.
Tools Needed
- Compression tester (with 14mm adapter for GCV160)
- Socket wrench or spark plug socket
- Safety gloves and goggles
Steps to Test Compression
- Warm up the engine for 2–3 minutes to ensure accurate readings.
- Turn off the engine and disconnect the spark plug wire.
- Remove the spark plug using a socket wrench.
- Screw the compression tester into the spark plug hole. Ensure it’s tight and sealed.
- Hold the throttle wide open (to allow maximum air intake).
- Pull the starter cord rapidly 4–6 times or use an electric starter if equipped.
- Record the highest reading on the gauge.
Interpreting Results
- Normal compression: 90–120 PSI (pounds per square inch). The GCV160 typically reads around 100–110 PSI when healthy.
- Low compression (below 80 PSI): Indicates possible piston ring wear, cylinder scoring, or valve issues.
- Zero or very low compression: Suggests severe ring failure or broken piston.
If compression is low, proceed to a leak-down test for more detailed diagnosis.
Step 3: Leak-Down Test for Confirmation
A leak-down test pinpoints where compression is escaping. It’s more precise than a compression test and helps confirm if rings are the issue.
Tools Needed
- Leak-down tester (with regulated air supply)
- Compressed air source (portable compressor)
- Socket wrench
Steps to Perform a Leak-Down Test
- Remove the spark plug and rotate the engine until the piston is at top dead center (TDC) on the compression stroke. You can do this by feeling for compression with your thumb over the spark plug hole as you turn the flywheel.
- Connect the leak-down tester to the spark plug hole.
- Attach the air supply and pressurize the cylinder to about 80–100 PSI.
- Listen for air leaks:
- Hissing from the exhaust: Indicates exhaust valve leak.
- Hissing from the intake: Suggests intake valve leak.
- Bubbling in the oil filler cap or dipstick tube: Points to piston ring or cylinder wall leakage.
- Air escaping through the carburetor: May mean a stuck intake valve or carburetor issue.
- Note the percentage of leakage shown on the tester. Over 20% leakage past the rings suggests significant wear.
If most of the air is escaping past the piston, the rings are likely the culprit.
Step 4: Disassembling the Engine
Now that you’ve confirmed piston ring issues, it’s time to open up the engine. Work in a clean, well-lit area and keep track of all parts.
Safety First
- Disconnect the spark plug wire to prevent accidental starts.
- Drain the engine oil and fuel to avoid spills.
- Wear safety goggles and gloves.
Remove the Engine Cover and Cylinder Head
- Remove the air filter housing and carburetor (label hoses for reassembly).
- Unscrew the cylinder head bolts in a crisscross pattern to avoid warping.
- Lift off the cylinder head and inspect the head gasket. Replace if damaged.
- Remove the head gasket and set it aside.
Extract the Piston and Connecting Rod
- Turn the engine upside down and remove the oil pan (if applicable).
- Remove the connecting rod cap bolts. Keep the cap and bolts in order.
- Gently push the piston assembly out through the top of the cylinder.
- Place the piston and rod assembly on a clean surface.
Step 5: Inspecting the Piston Rings and Cylinder
Now examine the components for signs of wear or damage.
Check the Piston Rings
- Remove the old rings using a piston ring expander or small screwdriver. Be gentle to avoid scratching the piston.
- Inspect each ring for:
- Cracks or breaks: Common in older engines or those exposed to overheating.
- Excessive wear: Measure ring thickness with a micrometer. Compare to specs (typically 1.5mm for compression ring).
- Carbon buildup: Stuck rings can’t seal properly. Clean with a ring groove cleaner or fine wire brush.
- Check ring end gap by inserting the ring into the cylinder (without the piston). Use a feeler gauge. The gap should be 0.004–0.006 inches (0.10–0.15mm). If too tight, the ring may seize when heated.
Inspect the Cylinder Wall
- Look for scoring, scratches, or glazing. Light scratches can be honed, but deep grooves require cylinder boring.
- Measure cylinder bore diameter with a bore gauge. Compare to factory specs (GCV160 bore is typically 66.0mm). Wear over 0.003 inches (0.076mm) may require reboring.
- Check for taper (difference between top and bottom measurements). Excessive taper indicates wear.
Examine the Piston
- Look for cracks, especially around the ring grooves.
- Check for piston skirt wear or scuffing.
- Measure piston diameter at the skirt, 90 degrees from the wrist pin. Compare to specs.
Step 6: Cleaning and Preparing Components
Even if you’re replacing the rings, clean all parts thoroughly.
Clean the Piston
- Use a parts cleaner or solvent to remove carbon from the ring grooves and piston top.
- Use a ring groove cleaning tool or a broken ring to scrape out stubborn deposits.
- Rinse and dry completely.
Clean the Cylinder
- Wipe the cylinder wall with a clean cloth and solvent.
- For light glazing, use a flexible cylinder hone (ball hone) with light pressure and oil.
- Wash out metal particles and dry thoroughly.
Inspect Other Components
- Check the connecting rod for wear or bend.
- Inspect the wrist pin and piston pin bore for play.
- Replace the head gasket and any worn seals.
Step 7: Installing New Piston Rings
Use a high-quality replacement piston ring set designed for the GCV160. Aftermarket rings are available from reputable brands like Honda Genuine Parts, Vertex, or OEM equivalents.
Prepare the New Rings
- Check the end gap as described earlier. File the ends slightly if the gap is too tight.
- Ensure the rings are the correct size and type (compression vs. oil ring).
Install the Rings
- Start with the oil ring. Install the expander first, then the two side rails. Ensure the rails are seated properly.
- Install the compression ring. Note the marking (usually a dot or “TOP”)—this side must face up.
- Use a piston ring compressor tool to compress the rings as you insert the piston into the cylinder.
- Align the ring gaps 180 degrees apart to prevent leakage.
Reassemble the Engine
- Insert the piston into the cylinder with the front mark (arrow) facing the exhaust port.
- Reattach the connecting rod cap with new bolts if possible. Torque to spec (typically 12–14 ft-lbs).
- Reinstall the cylinder head with a new head gasket. Torque bolts in sequence to 16–18 ft-lbs.
- Reconnect the carburetor, air filter, and fuel lines.
- Refill with fresh engine oil (SAE 10W-30 or as recommended).
Step 8: Testing and Break-In
After reassembly, test the engine carefully.
Initial Start-Up
- Prime the engine if equipped.
- Start the engine and let it idle for 5–10 minutes.
- Listen for unusual noises or leaks.
Break-In Procedure
New piston rings need a proper break-in to seat correctly.
- Run the engine under light load for the first 2–3 hours.
- Avoid full throttle or heavy loads during break-in.
- Change the oil after the first 5 hours to remove any metal particles.
Final Compression Check
Recheck compression after break-in. It should now be within the normal range (90–120 PSI).
Troubleshooting Common Post-Repair Issues
Even after replacing the rings, problems can persist.
Engine Still Backfiring
- Double-check ignition timing and spark plug condition.
- Ensure the carburetor is clean and properly adjusted.
- Verify valve clearance (should be 0.004–0.006 inches for both valves).
Low Compression After Repair
- Confirm rings are installed correctly and gaps are staggered.
- Check for warped cylinder head or damaged head gasket.
- Ensure piston is inserted in the correct orientation.
Excessive Oil Consumption
- May indicate improper ring seating or worn cylinder.
- Perform a leak-down test to confirm ring seal.
Preventing Future Piston Ring Problems
Regular maintenance is key to extending the life of your GCV160’s piston rings.
- Use fresh, high-quality fuel: Avoid ethanol blends if possible.
- Change oil regularly: Every 25–50 hours or annually.
- Keep the air filter clean: Inspect monthly during heavy use.
- Avoid overheating: Ensure proper ventilation and don’t overload the engine.
- Use the correct oil: SAE 10W-30 or manufacturer-recommended grade.
Conclusion
Backfiring in your GCV160 engine can be frustrating, but with the right approach, it’s often fixable. By systematically diagnosing the issue—starting with spark plug and air filter checks, then moving to compression and leak-down tests—you can confidently determine if the piston ring set is the culprit. Replacing worn or damaged rings with proper installation and break-in procedures will restore engine performance and prevent future problems.
Remember, small engines like the GCV160 are built for reliability, but they still need care. Regular maintenance not only prevents backfiring but also extends the life of your equipment. Whether you’re maintaining a lawn mower or a pressure washer, understanding how piston rings work and how to troubleshoot them empowers you to keep your tools running smoothly for years to come.