
This guide helps you diagnose and fix rough running issues in your Honda GCV160 engine caused by flywheel problems. You’ll learn how to inspect, test, and replace the flywheel safely and effectively.
Key Takeaways
- Understand the role of the flywheel: The flywheel stores rotational energy and works with the ignition system to ensure smooth engine operation. A damaged or misaligned flywheel can cause misfires and rough idling.
- Check for loose or damaged flywheel nuts: A loose flywheel nut is a common cause of vibration and poor engine performance. Always torque it to the manufacturer’s specification after inspection.
- Inspect the flywheel key: A sheared or worn flywheel key can cause timing issues, leading to hard starting and erratic running. Replace it if damaged.
- Look for cracks or warping: Physical damage to the flywheel, such as cracks or warping, can disrupt balance and cause severe vibration. Replace the flywheel if structural damage is found.
- Test the ignition system components: Faulty ignition coils or magnets near the flywheel can mimic flywheel problems. Test these parts before replacing the flywheel.
- Use proper tools and safety gear: Always disconnect the spark plug, use a flywheel puller, and wear safety glasses when working on the engine.
- Perform regular maintenance: Clean the flywheel area and check fasteners during routine service to prevent future issues.
Quick Answers to Common Questions
Tip/Question?
Can I reuse a slightly worn flywheel key?
No. Even a slightly damaged key can cause timing issues. Always replace it with a new one to ensure proper alignment.
Tip/Question?
How tight should the flywheel nut be?
Tighten it to 35–40 ft-lbs using a torque wrench. Over-tightening can damage the crankshaft.
Tip/Question?
Do I need a special tool to remove the flywheel?
Yes. A flywheel puller is essential. Never use a hammer or pry bar—it can cause serious damage.
Tip/Question?
Can a dirty flywheel cause rough running?
Yes. Dirt and debris can affect balance and cooling. Clean the area regularly during maintenance.
Tip/Question?
What if my engine still runs rough after replacing the flywheel?
Check the carburetor, fuel system, and ignition coil. The issue may not be flywheel-related.
Introduction: Why Your GCV160 Is Running Rough
If your Honda GCV160 engine is sputtering, vibrating, or stalling, the flywheel might be the culprit. The flywheel is a heavy metal disc attached to the engine’s crankshaft. It plays a crucial role in maintaining engine momentum and works closely with the ignition system to deliver smooth power. When something goes wrong with the flywheel or its related components, your engine can run rough, misfire, or even fail to start.
This guide walks you through a complete troubleshooting process for flywheel-related issues on the GCV160 engine. Whether you’re a homeowner maintaining a lawnmower, pressure washer, or generator, this step-by-step guide will help you identify, diagnose, and fix the problem. You’ll learn how to inspect the flywheel, test ignition components, and perform safe repairs—without needing professional help.
By the end of this guide, you’ll have the knowledge and confidence to restore your GCV160 to smooth, reliable operation. Let’s get started.
Understanding the Flywheel’s Role in the GCV160 Engine
Before diving into troubleshooting, it’s important to understand what the flywheel does. In the GCV160 engine, the flywheel serves three main functions:
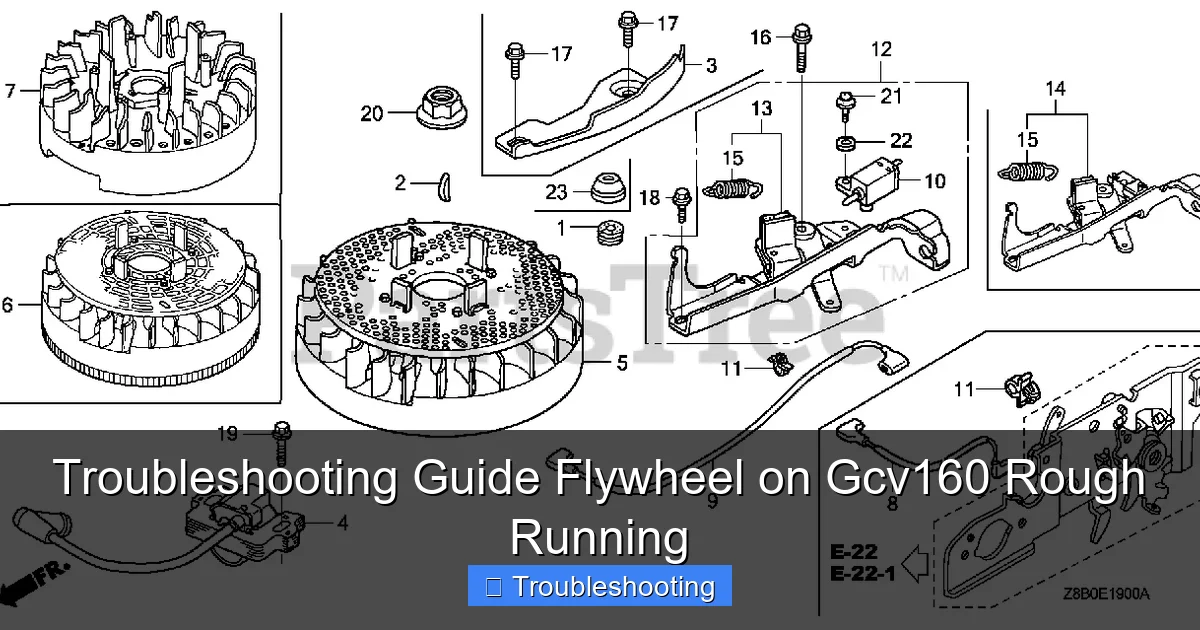
Visual guide about Troubleshooting Guide Flywheel on Gcv160 Rough Running
Image source: d3iaqnfgzi8w52.cloudfront.net
- Stores rotational energy: As the engine runs, the flywheel keeps spinning between power strokes, helping maintain consistent engine speed.
- Assists in ignition timing: The flywheel has magnets embedded in it. As it spins past the ignition coil, it generates an electrical spark. If the flywheel is damaged or misaligned, the spark timing can be off.
- Provides mounting for the recoil starter: On many GCV160 engines, the flywheel also holds the starter rope mechanism.
Because the flywheel is directly connected to the crankshaft and interacts with the ignition system, any issue with it can quickly lead to rough running. Common symptoms include:
- Engine misfires or runs unevenly
- Excessive vibration or shaking
- Hard starting or failure to start
- Loss of power under load
- Unusual noises from the engine top end
If you’re experiencing any of these, it’s time to inspect the flywheel.
Step 1: Safety First – Preparing to Work on the Engine
Working on small engines like the GCV160 can be dangerous if proper safety steps aren’t followed. Here’s how to prepare:

Visual guide about Troubleshooting Guide Flywheel on Gcv160 Rough Running
Image source: blog.hondalawnparts.com
Disconnect the Spark Plug
Always start by disconnecting the spark plug wire and grounding it against the engine block. This prevents accidental engine starts while you’re working. Remove the spark plug using a spark plug wrench and inspect it. A fouled or damaged plug can also cause rough running, so replace it if necessary.
Drain the Fuel (If Needed)
If you need to tip the engine or remove the blower housing, drain the fuel tank to prevent spills. Use a siphon pump or tilt the engine carefully to pour out any remaining fuel into an approved container.
Wear Protective Gear
Wear safety glasses to protect your eyes from debris. Gloves are also recommended to protect your hands from sharp edges and hot surfaces.
Gather the Right Tools
You’ll need the following tools for this job:
- Socket wrench set (typically 10mm and 14mm sockets)
- Flywheel puller (specific to GCV160 or universal type)
- Torque wrench
- Screwdrivers (flathead and Phillips)
- Pliers
- Clean rags
- Penetrating oil (like WD-40)
- Replacement parts (flywheel key, gaskets, etc.)
Having the right tools on hand saves time and reduces frustration.
Step 2: Remove the Blower Housing and Access the Flywheel
To inspect the flywheel, you’ll need to remove the engine’s blower housing—the plastic or metal cover on top of the engine.
Locate and Remove the Housing Screws
Use a screwdriver or socket wrench to remove the screws securing the blower housing. These are usually located around the perimeter of the cover. Keep the screws in a small container so they don’t get lost.
Lift Off the Housing
Gently lift the housing off the engine. Be careful not to damage any wires or the air filter housing. Set it aside in a clean, dry place.
Inspect the Area
Once the housing is off, you’ll see the flywheel. Look for obvious signs of damage, such as cracks, missing pieces, or excessive dirt buildup. Use a rag to clean around the flywheel, but avoid spraying liquids directly onto it.
Now you’re ready to inspect the flywheel and its components.
Step 3: Inspect the Flywheel for Physical Damage
A damaged flywheel can cause imbalance, vibration, and ignition problems. Here’s how to check it thoroughly.
Check for Cracks or Warping
Visually inspect the flywheel for cracks, especially around the mounting holes and near the magnet areas. Use a flashlight to get a better view. If you see any hairline cracks or deep scoring, the flywheel may need replacement.
To check for warping, place a straightedge across the flywheel surface. If there’s a gap larger than 0.5mm, the flywheel is likely warped and should be replaced.
Look for Loose or Missing Magnets
The GCV160 flywheel has small magnets embedded in it. These generate the magnetic field needed for the ignition coil. If a magnet is loose, cracked, or missing, the engine may misfire or not start at all.
Gently press on each magnet. If any move or feel loose, the flywheel must be replaced. Do not attempt to glue or reattach magnets—this is unsafe and ineffective.
Check the Flywheel Nut and Key
The flywheel is secured to the crankshaft by a large nut and a small metal key. The key fits into a slot on both the crankshaft and the flywheel, ensuring proper alignment.
Inspect the flywheel nut for tightness. If it’s loose, it can cause wobbling and vibration. However, do not tighten it yet—you’ll need to remove the flywheel first to inspect the key.
Look at the flywheel key. It’s a small, rectangular piece of metal that sits in the crankshaft slot. If it’s sheared, flattened, or missing, it can cause timing issues. A damaged key is one of the most common causes of rough running after reassembly.
Step 4: Remove the Flywheel Safely
Removing the flywheel requires a special tool called a flywheel puller. Never use a hammer or pry bar—this can damage the crankshaft or flywheel.
Loosen the Flywheel Nut
Use a socket wrench to loosen the flywheel nut. It’s usually tightened to around 35–40 ft-lbs, so it may be tight. If it won’t budge, apply penetrating oil and let it sit for 10–15 minutes.
Important: Do not remove the nut completely yet. Leave it threaded a few turns to protect the crankshaft threads during removal.
Install the Flywheel Puller
Screw the puller bolts into the threaded holes on the flywheel. Tighten them evenly in a crisscross pattern. As you tighten, the puller will lift the flywheel off the crankshaft.
Turn the puller center bolt slowly. The flywheel should pop off with a slight “tap.” If it’s stuck, double-check that the nut is loose and the key is removed.
Remove the Flywheel
Once the flywheel is free, carefully lift it off the crankshaft. Place it on a clean surface. Inspect the crankshaft end for damage or wear.
Remove and Inspect the Flywheel Key
The flywheel key should now be visible in the crankshaft slot. Remove it and inspect it closely. If it’s sheared, worn, or damaged, replace it with a new one. Never reuse a damaged key.
Step 5: Test the Ignition System
Before replacing the flywheel, test the ignition components to rule out other causes of rough running.
Check the Ignition Coil Gap
The ignition coil sits near the flywheel and generates the spark. If the gap between the coil and flywheel is too wide or too narrow, the spark may be weak or inconsistent.
Use a feeler gauge to measure the gap. The correct gap for the GCV160 is typically 0.25–0.35mm. Adjust the coil position if needed by loosening the mounting screws and sliding it closer or farther from the flywheel.
Test the Coil with a Multimeter
Set your multimeter to ohms (Ω). Test the primary coil (small terminals) for resistance—it should read between 0.2 and 2.0 ohms. Test the secondary coil (high-tension lead) for 2,000–5,000 ohms. If readings are out of range, replace the coil.
Inspect the Spark Plug
Reinstall the spark plug and reconnect the wire. Ground the plug against the engine and pull the starter rope. You should see a strong blue spark. If the spark is weak or absent, the issue may be with the coil or flywheel timing.
Step 6: Reassemble and Reinstall the Flywheel
Once you’ve inspected and tested all components, it’s time to put everything back together.
Install a New Flywheel Key
Place a new flywheel key into the crankshaft slot. Make sure it fits snugly and sits flush. Do not force it—if it doesn’t slide in easily, check for burrs or misalignment.
Position the Flywheel
Align the flywheel so the keyway matches the key. Slide the flywheel onto the crankshaft. It should fit smoothly without binding.
Tighten the Flywheel Nut
Thread the flywheel nut by hand first, then tighten it with a torque wrench. The recommended torque for the GCV160 is 35–40 ft-lbs. Over-tightening can damage the crankshaft; under-tightening can cause loosening over time.
Reinstall the Blower Housing
Replace the blower housing and secure it with the screws. Make sure all wires are clear and the air filter is properly seated.
Reconnect the Spark Plug
Reinstall the spark plug and reconnect the wire. Double-check all connections before starting the engine.
Step 7: Test the Engine
Start the engine and listen for smooth operation. Let it run for a few minutes and observe:
- Does it idle smoothly?
- Is there any vibration or noise?
- Does it accelerate without hesitation?
If the engine runs well, the problem is likely fixed. If rough running persists, revisit the ignition system or consider professional diagnosis.
Troubleshooting Common Issues After Reassembly
Even after proper reassembly, some issues may remain. Here’s how to address them:
Engine Still Runs Rough
If the engine is still misfiring, check the carburetor for clogs or stale fuel. Clean or rebuild it if necessary. Also, verify the ignition timing by ensuring the flywheel key is properly aligned.
Excessive Vibration
Vibration may indicate a warped flywheel or unbalanced assembly. Recheck the flywheel for flatness and ensure the nut is properly torqued.
No Spark or Weak Spark
Double-check the ignition coil gap and connections. Test the coil again with a multimeter. If all else fails, replace the coil.
Flywheel Won’t Stay Tight
If the flywheel nut keeps loosening, inspect the crankshaft threads for damage. Use a thread locker (like Loctite 242) on the nut, but avoid overuse.
Preventative Maintenance Tips
To avoid future flywheel problems, follow these maintenance tips:
- Inspect the flywheel and key during annual service.
- Keep the engine clean and free of debris.
- Use fresh fuel and add a fuel stabilizer if storing for long periods.
- Replace the spark plug every season.
- Check all fasteners for tightness regularly.
Regular care extends the life of your GCV160 and prevents costly repairs.
Conclusion
Rough running in your Honda GCV160 engine can often be traced back to the flywheel or its related components. By following this troubleshooting guide, you’ve learned how to safely inspect, remove, and reinstall the flywheel, test the ignition system, and address common issues. With the right tools and careful attention to detail, you can restore your engine to peak performance.
Remember, safety comes first—always disconnect the spark plug and use proper tools. If you’re unsure at any step, consult a professional. But for most homeowners, this guide provides everything needed to fix flywheel-related rough running and keep your equipment running smoothly for years to come.